
Foreword
I wrote the core of this paper in 1989. It was part of a series that I was working on about errors introduced when recording. They are part of the answer to "why do things sound they way they do". One reason these errors needed quantifying is because of the tendency of some researchers to subject recordings to sophisticated analysis yet know next to nothing about the errors introduced by the recording system. As the technical director of an archive it is important to supply the analytical end user with as much information about recording artifacts as possible. I have never found the specific paper but I am told one exists where a recording was subjected to rigorous analysis and conclusions made about the subject, sadly not from sounds the subject made but entirely from distortion in the recording.
The graphics are a little rough having come through conversion from the original drawings, done on a Mac(1 meg) or maybe an SE.
The core paper: The Well Connected Microphone: Microphones and Input
Circuits, was published in Bioacoustics, The International Journal
of
Animal Sound and its Recordings, 1991 Vol. 3. pp. 141-146.
Copyright
1991. AB Academic Publishers
Table of Contents
ABSTRACT
This paper describes the effect that placing a
transformer
between a microphone and the following electrical input has on a
signal.
Proper application is discussed and the results from improper
application
are illustrated. A brief glossary of technical terms is included.
INTRODUCTION
This paper describes each element required for
the
correct interfacing of a microphone output to a microphone input. The
connection
of a microphone output to a microphone input is an electrical interface
that, if incorrectly configured, degrades the transferred signal in a
significant
way. The nature of a microphone's electrical output is examined. Design
practices of several microphone manufacturers are given. The microphone
input characteristics of various equipment is surveyed to facilitate
comparison
with the requirements of a given microphone. The effects of using an
input
transformer, either internal to a component or an accessory inserted
in-line,
is examined. Common wiring protocols are illustrated. Also included are
measurements of the input impedance of some commonly used equipment.
For
the reader unfamiliar with some of the terminology a section of brief
definitions
is included at the end of the paper.
THE PROBLEM
Changing an acoustic signal to an electrical one
requires a transducer. A microphone is usually the transducer used for
sounds listened to directly by humans. The microphone's electrical
output
is a close analog of the sound it encounters. The next step in the path
for the microphone's output signal is the microphone input of the
recorder,
mixer, console or other device incorporating a microphone input. The
electrical
interface of the microphone's output to the microphone input is a
critical
one. To lose or distort some of the desired signal at this interface
guarantees
that the signal to noise ratio of the signal will be lessened. The
potential
degradation of the desired signal can be minimized if one understands
the
rationale of microphone and equipment designers.
MICROPHONE OUTPUTS
All but a few microphones used in professional audio applications have balanced, low impedance outputs. Microphones with unbalanced outputs of either low or high impedance are commonly found in consumer and communications applications. A low impedance output for most microphones is nominally 35 to 600 ohms with the vast majority being around 200 ohms. This means that the microphone is intended for connection to a similarly labeled input, having an actual input impedance which is about 10 times that of the microphone.
A microphone converts acoustic energy to electric energy. If the
output
impedance of the microphone is matched to the input impedance of a
device
the maximum amount of power will flow into the input circuit. This,
while
seeming desirable, is not how professional microphones are meant to be
used. When the microphone's output is matched to that of the connected
input, its internal impedance is in series with the equal impedance of
the microphone input. This divides the voltage output from the
microphone
between its own internal impedance and the impedance of the input being
fed. In this configuration only half of the voltage available from the
microphone will be seen at the microphone input. This is a 6 dB loss of
signal. Since there is a minute amount of power (typically around 10-9
Watt)
coming from a microphone it is more useful to obtain the maximum
voltage
level from the microphone. This will occur if the output of the
microphone
is "unloaded" or "bridged". This results in the maximum voltage from
the
microphone being available to the input circuits. A schematic drawing
of
this is shown in Figure 1.
In the unloaded configuration the noise from the microphone increases as well. However, the increase in noise, 3 dB, is only half that of the signal because the noise adds randomly whereas the signal adds linearly. Additionally, input circuits have some residual electronic noise. Therefore, the more signal available from the microphone, the greater the signal to noise ratio.
Most manufacturers state in their literature the impedance a particular microphone expects to be connected to. For example Sennheiser gives a value for each of the company's microphones:
|
|
|
|
| Sennheiser MD-421 | 200 ohm | 200 ohm |
| Sennheiser MD-441 | 200 ohm | 1000 ohm |
| Sennheiser ME-88 | 130 ohm* | 300 ohm* |
| Sennheiser MKH-416 | 10 ohm | 400 ohm** |
| Sennheiser MKH-816 | 10 ohm | 600 ohm** |
1. What are the changes in performance when the microphone is
terminated
with an impedance equal to the specified impedance of microphone?
2. What are the effects of different input impedance on microphone
performance
3. At what impedance is the microphone no longer affected?
4. What happens to the performance of built in filters and pads when
the microphone is matched instead of bridged
5. What happens to the performance of the built in filters if the
microphone
is bridged
(10x impedance)
6. What is the preferred operating input impedance
7. For battery power supplies and adapters, as above. (When a
manufacturers
in-line unit is used with a particular microphone).
8. Are you adhering to the ISO standard on polarity? (positive pressure
= positive voltage on pin 2)
The responses obtained can be generalized:
When a microphone is connected to an impedance that matches that of the microphone the output will drop. With a very few exceptions, frequency response will be skewed, distortion will rise, maximum sound level before distortion will decrease, noise will rise, and the frequency response of internal filters may change.
While a few microphones only exhibit a loss of level when matched, all are designed with the expectation they will be bridged or unloaded (i.e. not be loaded by the input following).
Battery power supplies and adapters are designed with the same expectation of input configuration as microphones. For example the Sennheiser MZA-14 power supply specifies a minimum terminating impedance of 1000 ohms.
All of the manufactures questioned indicate that for current
production
of professional microphones a positive pressure would cause a positive
voltage on pin 2 with respect to pin 3 (pin 1 is connected to the
shield).
MICROPHONE INPUTS
It is possible to find microphone inputs that actually have a low impedance. They date from the years of the carbon grain microphone. If one is using antique audio equipment (pre - 1950's) the microphone input could have an impedance around 50 ohms. However, consulting the 1952 edition of the Radiotron Designers Handbook, "Most microphones are designed to work into an unloaded transformer. " Current practice is to design a microphone input to bridge the microphone output (while ten times microphone impedance is usual, sometimes a multiple of five is used).
To get a sense of current practice, the 1000 Hz input impedance of some available equipment was measured.
| Equipment | Device | Transformer | Balanced / Unbalanced | Measured Impedance |
| MCI-JH-600 | Console | No | Balanced |
3200 ohms
|
| Shure M-67 | Mixer | Yes | Balanced |
800 ohms
|
| Yamaha M1516 | Console | Yes | Balanced |
1100 ohms
|
| Neve 8014 | Console | Yes | Balanced |
920 ohms
|
| Ramsa WR-8816 | Console | No | Balanced |
4600 ohms
|
| Marantz PMD-221 | Cassette Rec. | No | Unbalanced |
8400 ohms
|
The impedance given in Table 2 are for the particular pieces of equipment measured and should not be taken as being the specified impedance for the model named. There are unit to unit variations, input pads can cause a change and a given model may have different input options.
Balancing
There are two ways a balanced input can be realized. One is a
"transformerless"
input, balanced by the electronic circuitry itself. The other is a
transformer
coupled input. While more and more new equipment uses transformerless
inputs
the majority still employ input transformers.
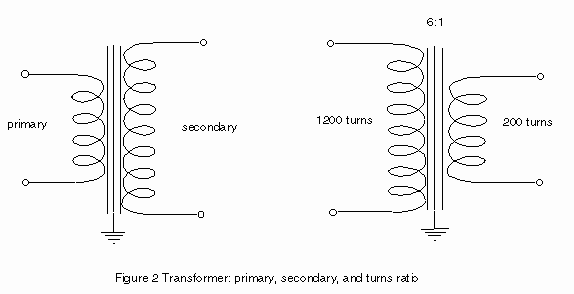
TRANSFORMERS
Transformers are electrical devices that use a coil or coils of wire
on an iron (or other magnetic material) core to step up or step down
voltage
or current. In the audio signal path they can be used for isolation,
impedance
change, balancing or unbalancing. Typically they are made of two
windings
around a magnetic core. One winding or "side" of a transformer is
called
the primary and the other is called the secondary. Each winding has a
number
of turns of wire around the core, and the ratio of the turns of one
winding
to the other is the ratio of the voltage change from one winding to the
other. (See Figure 2.)
The impedance ratio of a transformer is the square of the turns or
voltage ratio. The actual impedance of one side of a transformer is
largely
determined by the impedance of whatever is connected to the other side
of the transformer. The impedance of one side of a transformer is
"reflected"
from what is connected to the other side. The "characteristic"
impedance
of many transformers is given in ohms. This value is only accurate if
the
other winding is connected to its specified value.
If a transformer is labeled: "primary 250 ohms, secondary 47,000 ohms", the 250 ohm winding will have an impedance of 250 ohms only when the secondary is connected to an impedance of 47,000 ohms. If the secondary is connected to an impedance of 470,000 ohms the primary will be 2500 ohms. If the secondary is connected to 4700 ohms then the primary will be 25 ohms (other factors may keep this from being the actual measurement). In this example the ratio of the impedance of the primary to the impedance of the secondary is 1:188 and the voltage ratio (primary/secondary) is 1:13.7. If the voltage ratio is converted to decibels the result is 22.7dB (20 Log 13.7).
Transformers are labeled with their characteristic impedance to
assure
optimum performance for a selected application. There is no universal,
perfect, transformer. If there were, all that would be needed is the
turns
ratio. (ignoring power handling and frequency response) In reality,
transformers
have insertion loss, limited bandwidth and level handling capability.
The
capacitive and reactive components of the impedance can cause uneven
frequency
response and phase shift. As with any audio component the key to
satisfactory
performance is proper application.
APPLICATIONS
A manufacturer can properly choose and configure its input transformers to work correctly when used in an intended application. Most of the time this is what happens. There are however, accessory in-line transformers sold for "matching" a microphone to an input. This "matching" can accomplish two things. It can change a line from balanced to unbalanced and change the impedance. It does not have to do both. There are balanced to balanced transformers and transformers with a 1:1 turns ratio. Figure 3 illustrates three ways of configuring an input transformer, depending on the type of input desired. Configuration (a) is labeled "symmetrical", which is correct. However, common usage is to call configuration (a) "balanced" as well as configuration (c). Configuration (c) is seldom found in modern sound equipment. When an input is described as "balanced" in this paper it is the common usage(a). It should properly be called "symmetrical".

| In Line Transformer |
Specified
|
Impedance | Measured 1000 | Hz Impedance |
| Number |
|
|
|
|
| #1 |
|
|
|
43,200 ohms
|
|
|
51,500 ohms
|
|||
|
|
60,500 ohms
|
|||
| #2 |
|
|
|
3,100 ohms
|
Figure 4 illustrates the results of the application of the in-line
transformers
from Table 3. White noise (equal energy per Hertz) was fed to a typical
electret condenser microphone preamplifier. The manufacturer recommends
a minimum termination of 300 ohms. The output was fed to the analyzer
with
its input configured for an impedance of 10,000 ohms. This value was
chosen
as it is representative of many unbalanced microphone inputs. The
lowest
trace is the output of the preamplifier. It indicates a very mild loss
of signal starting around 10 kHz. The middle trace is the preamp
through
transformer number 1. It has greater output at the low frequencies but
shows a dramatic loss of high frequencies. The top trace is the preamp
through transformer number 2. It shows only a mild loss of highs and
offers
more output than the preamp by itself.

Figure 4. Frequency Response with and without in-line transformer.
Analyzer input =10,000 ohms
How well do the measurements agree with calculated results? Connecting transformer 1, with its 51,000 ohm output (average) to a 10,000 ohm input is a substantial mismatch. The skewed frequency response curve is one indication. Transformer number 2, with its 3000 ohm secondary connected to the 10,000 ohm analyzer input reflects an impedance of around 500 ohms to the microphone preamp. A 500 ohm input meets the manufacturers requirement of a termination of 300 ohms or more. By calculation the 150/3000 ratio should yield a level increase of 13 dB. The graph shows an increase of around 11 dB. Good agreement, given the number of variables.
The example given in Figure 4 represents an ideal case. The input impedance was realized with a precision non-inductive resistor. What happens in a real application is shown in Figure 5. The only difference from Figure 4 is that a consumer cassette recorder was placed in the line with its output feeding the input of the analyzer. The measured input impedance of the cassette machine was a bit less than the 10,000 ohms used for Figure 4. Note the degraded frequency response, especially with the mismatched transformer (number 1).
This figure demonstrates, as well, the necessity of confirming the performance of a recording system. This must be done by configuring the system as it will be used and checking overall performance. System performance cannot be assumed by summing the parts.

INTERCONNECTING

Figure 6 illustrates two standard ways to connect a microphone to a
microphone input. Figure 7 illustrates the connection of a microphone
with
a balanced output to an unbalanced input. Unbalancing a microphone in
this
manner, given that the cable length is not long, generally causes no
problem.

SUMMARY
This article has presented an overview of what is expected and what may actually happen when a microphone is connected to an input. For most users, most of the time, simply connecting the microphone to an input results in satisfactory performance. However, for critical and demanding applications, small differences in input configurations can contribute to significant differences in sound quality.
When a microphone is mismatched to a microphone input, signal degradation occurs. While it is possible to "creatively mismatch" a microphone to enhance a specific parameter at the expense of others it should only be done with full understanding of the trade-offs. The use of in-line transformers should be undertaken with extreme caution. Most that are offered remain from the days of tube type unbalanced high impedance inputs of half a million ohms or more. The fact that the connectors are of the correct type to interconnect the components in no way assures the user that the interface is correct.
Finally, this is just an overview. The bibliography gives a number
of
good sources to begin an investigation of the components of the audio
chain
that begin, and therefore fix, the limit of the maximum quality of the
signal.
GLOSSARY
DECIBEL. The intensity of sound can vary over a range of about a billion to one. It quickly became apparent to those making measurements that a logarithmic scale was preferable. The notation system used is the decibel system. Initially the unit was a bel, honoring Alexander Graham Bell. It was too wide an interval and was divided by 10, becoming the decibel. The decibel notation system always expresses a power ratio. dB is the logarithm (base 10) of the ratio, multiplied by 10. The formula for expressing a power (P) ratio in dB is 10 log P1/P2. To express voltage or current or pressure in dB the formula is multiplied by 2 because these quantities vary as the square root of the power. For voltage (V) the formula is 20 log V1/V2. dB only quantifies a ratio. It represents a specific quantity only if there is a reference point. Some common reference points: For sound pressure level, SPL, 0 dB SPL is 2x10⁻⁵ Pascal (Pa). For audio power the reference for 0 dBm is 1 milli-watt (.001 watt). For voltage the reference for 0 dBv is 1 volt.
FREQUENCY RESPONSE. Frequency response describes the ability of a device to pass signal with respect to frequency. Presented graphically the amplitude is shown on the Y axis and the frequency on the X. If there is no change in amplitude across the spectrum the response is called "flat," referring to the appearance on the graph. In written form the upper and lower limits are given, usually taken at the point where the response has fallen 3 dB, followed by the amount of variation of amplitude from a reference point (usually 1000 Hz). For example a microphone's frequency response might be given as 50 to 15,000 Hz, ±3dB.
SIGNAL TO NOISE RATIO. Signal to noise ratio (s/n) is a measure of the distance (level difference) between the signal and the noise. The noise specification often includes a weighting curve, usually "A" weighting. The weighting of the noise specification adjusts it to better approximate human sensitivity to noise by frequency. (Figure 8)

DYNAMIC RANGE. Dynamic range is a term that is linked to the signal
to noise ratio. It expresses the range of level a device can
accommodate,
from a minimum, usually the noise floor, to the maximum, the point of
overload.
Figure 9 is a graphic representation of the relationship between noise
floor operating range, normal operating level, saturation and dynamic
range.
While this illustration applies to types of recorders the concepts are
the same for other types of equipment.

Figure 9.
DISTORTION. Distortion of a signal can be caused by many factors and can be expressed many ways. There are two types of distortion commonly stated for audio devices. Total Harmonic Distortion (THD) and Intermodulation Distortion (IM).
THD of a sine wave is the ratio of the sum (RMS) of the harmonics referenced to the fundamental. It is usually expressed as a percentage. Quite often the THD specification incorporates the residual noise of the device as well as the harmonic content. (THD+N) This results from measuring THD by removing the fundamental from the signal being analyzed and measuring what remains.
Intermodulation distortion(IM), indicates how much interaction occurs between two or more pure tones passed through a device. There are a number of standard IM tests used. The most common with American equipment is the SMPTE IM measurement. (SMPTE - Society of Motion Picture and Television Engineers) This test combines a 60 Hz with a 7000 Hz sine wave. The amplitude of the 60 Hz signal is four times the amplitude of the 7000 Hz signal. When this signal is passed through a device each sine wave modulates (distorts) the other. The amount of IM(SMPTE) distortion is the percentage of amplitude modulation of the high frequency.
IMPEDANCE. Impedance is the opposition of a circuit to the flow of alternating current. This opposition comes from the combination of resistance, capacitive reactance and inductive reactance to the alternating current. Reactance varies with the frequency of the alternating current.
BALANCED/UNBALANCED These terms are used when describing the configuration of the microphone input, output and wiring. A balanced configuration typically has three conductors. One is the shield or screen which surrounds the other two wires. An unbalanced system uses two conductors. One is the shield or screen and the other conductor is inside. In the balanced configuration the shield is connected to an appropriate ground and is used solely to protect the signal carrying conductors from outside interference. When noise does make it through the shield it is impressed on the signal carrying conductors in the same amount and direction. When connected to a balanced input, with one side being the negative of the other, this noise is canceled. With an unbalanced line the shield also carries signal. If noise makes it through the shield to the inner conductor it will be added to the desired signal. See Figure 10.
There is no relationship between the impedance of a system and
whether
or not it is balanced. Many incorrectly assume that an unbalanced
system
is high impedance and a balanced system is low impedance. If one
parameter
is known the other cannot be inferred.

Figure 10.
POLARITY. Polarity relates the direction of the acoustic pressure to
the electrical polarity of the signal at the output of the microphone.
The standard for a 3 pin connector in a balanced configuration is that
a positive pressure on the diaphragm of the microphone produces a
positive
voltage on pin 2 with respect to pin 3 of the connector. Pin 1 is the
shield.
Most manufacturers currently follow this standard. Figure 11 is a
schematic
representation of a positive pulse in air pressure at the microphone's
diaphragm output on pin 2 as a positive going electrical pulse.

Figure 11.
SENSITIVITY. Sensitivity indicates a microphone's efficiency converting sound energy to electricity. There are different ways of expressing this number. The method of deriving the value is usually the same. Differences occur because of different reference points. The procedure is to generate a known sound pressure at the microphone and measure its output with a voltmeter. Some manufacturers state sensitivity as if the microphone were operating into an impedance equal to that of the microphone. This would result in the output being 6 dB lower than if the microphone were unloaded. The specification is derived by computation using the unloaded or open circuit value.
MATCHING IMPEDANCES. The technical world generally defines matched impedances as impedances that are equal. Sometimes, in consumer publications matched is used as "suitable for use with". In this paper matched means equal.
BRIDGING. Bridging a circuit is connecting to a circuit in a way
that
does not substantially affect the signal in that circuit. This is
accomplished
by having the impedance of the bridging circuit high with respect to
the
circuit being connected to. Convention with audio circuits is that a
bridging
connection will have an impedance ratio of ten times or greater than
the
circuit it is connecting to. Figure 12 illustrates a bridging
transformer
with a ratio greater than 10 to 1 and a transformer bridging a line.

Figure 12.
NOTES
The technique for evaluating the performance of the microphone input in this paper used an adapter that allowed the direct injection of a test signal in place of the condenser capsule. This permits the entire electronic signal path to be evaluated. This technique was used only for one part of this investigation. Its use to investigate other parameters, such as distortion and phase has been tried informally. What was discovered stimulated some of the questions posed to the manufacturers. However, its use in a structured investigation remains to be done.
The following equipment was used for making the measurements:
General Radio 1382 Random Noise Generator
Bruel and Kjaer 2032 Dual Spectrum Analyzer
Fluke 8060A True RMS Digital Multimeter
Hewlett Packard 350D Attenuator
Figure 1. Change of Microphone Output Voltage,
Matched(a),
Unloaded(b).
Figure 2. Transformer, primary, secondary and turns
ratio.
Figure 3. Transformer input circuits, three
different
configurations.
Figure 4. Frequency Response With and Without In
line Transformer. Input of analyzer 10,000 ohms.
Figure 5. Frequency Response With and Without In
line Transformer. Input to microphone input of consumer cassette
recorder.
Output of cassette recorder input monitor position) to analyzer.
Figure 6. Interconnecting microphone to microphone
input.
Figure 7. Unbalancing a balanced microphone line.
Figure 8. Weighting Curves A, B, C.
Figure 9. Relationship of Noise Floor, Signal to
Noise Ratio and Operating Level and Dynamic Range.
Figure 10. Noise rejection of balanced and
unbalanced
lines.
Figure 11. Acoustical and Electrical Microphone
Polarity.
Figure 12. A Bridging Connection to a Signal Line.
Table 1. Microphone Impedance Ratings
Table 2. Measured Input Impedance
Table 3. Impedance of In-line Transformers
ACKNOWLEDGMENTS
Special thanks are due to Jim Gulledge for his kind and helpful editing and to Sten Whalström whose comments improved the paper.
Anon. (1953). Radiotron Designer's Handbook, Fourth Edition. Wireless Press for: Amalgamated Wireless Valve Company Pty. Ltd.; Sydney, Australia. Reproduced and distributed by: RCA Victor Division, Radio Corporation of America, Harrison, New Jersey.
Ballou, G. (1987). Handbook for Sound Engineers. Howard W. Sams; Indianapolis.
Bartlett, B. (1987). Choosing the Right Microphone by
Understanding
Design Tradeoffs.
J. Audio Eng. Soc. 35, 924-942.
Bartlett, B. (1987). Introduction to Professional Recording Techniques. Howard W. Sams; Indianapolis.
Borwick, J. (1980). Sound Recording Practice. Oxford University Press; London.
Davis, D. & Davis, C. (1975). Sound System Engineering. Howard W. Sams; Indianapolis.
Institute of Electrical and Electronics Engineers, Inc. (1984). IEEE Standard Dictionary of Electrical and Electronic Terms. Third Edition. New York.
Jorgensen, F. (1988). The Complete Handbook of Magnetic Recording. Third Edition, Tab Professional Books, Blue Ridge Summit, Pennsylvania.
Knoppow, R. (1985). A Bibliography of the Relevant Literature on the Subject of Microphones. J. Audio Eng. Soc., 33, 557-561.
Long, J. (1972). A Microphone Primer: Basic Construction, Performance, and Applications. Audio. December, 18-28.
-------. (1973a). A Microphone Primer: Basic Construction, Performance, and Applications, Part II: Choosing and Applying. Audio. January, 34-44.
-------. (1973b). A Microphone Primer: Basic Construction, Performance, and Applications, Conclusion. Audio. February, 48-50.
McKnight, J. G. (1981). "Matching", Signal Interconnections of Professional Components. Recording Engineer Producer. June, 69-73.
Pennington, T. (1985). Application Note 110. Rane Corporation.
Roberson, Howard A. (1986). Matching a Mike. Audio. August, 40.
Rossing, T. D. (1982). The Science of Sound. Addison-Wesley; Reading, Massachusetts.
Sank, J. R. (1985). Microphones. J. Audio Eng. Soc. 33, 514-547.
-------. (1977). The Compleat Microphone Evaluation. Audio. September, 48-58
-------. (1978). The Compleat Microphone Evaluation: An Update. Audio. September, 35-40
Smith, D. A. & Wittman, P. H. (1970). Design Considerations of Low-Noise Audio Input Circuitry for a Professional Microphone Mixer, J. Audio Eng. Soc. 18, 140-155
Tremaine, H. M. (1969). Audio Cyclopedia. Howard Sams and Co. Indianapolis.
All contents, text and images are copyright 1989, 1999 by David
Wickstrom
No unauthorized use is permitted.
Email - dave @ dwick strom . com